by Chris Arnold
In my last article, I wrote my first impression of the Behmor 1600, formerly known as the Joe Roaster, the brainchild of Joe Behm. After spending a few more weeks with it, I have learned more about it, and I hope to help you get the most from your Behmor 1600 Coffee Roaster. If you are too lazy to read the entire article, I will say that at a street price of around $300, I can recommend this roaster. But there are some caveats, and to get the most from the Behmor roaster, you will need to read on.

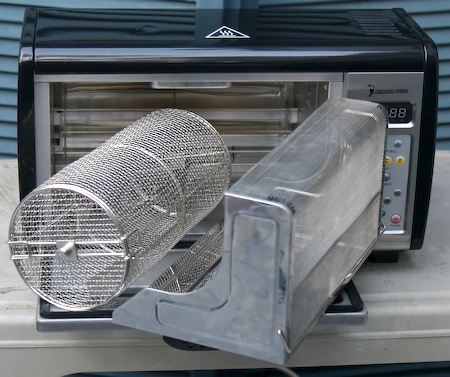
Behmor Coffee Roaster
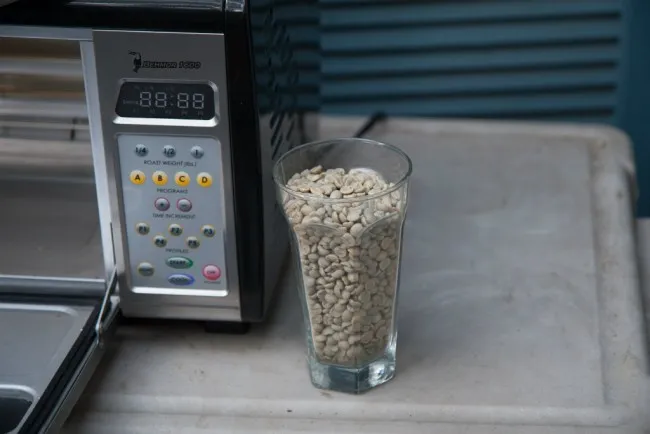
Batch Size
First things first. After a lot of experimenting, I found the optimum batch size to be about 9 ounces, especially for my typical voltage of 115 AC. Smaller batches were more erratic, and larger batches sometimes never reached 2nd crack, even when I maxed out the total roast time to 23:00 minutes. Stick with 8-10 ounces, and you will have the best results.
Voltage
Pretty much all the electric roasters of the consumer caliber are sensitive to swings in voltage. Using your voltage monitor of choice (I like to use a Kill a Watt), you can potentially adjust your batch size up or down a bit and perhaps use a more or less aggressive profile. This is something that will take trial and error, but if you secure several pounds of the same bean and keep a good roasting log, you should be getting repeatable results in no time – and giving away a lot of coffee.
Profiles and Settings
There are 5 Roasting Profile Curves that are pre-defined. You cannot create your own, or customize the existing ones. However, you can use the graphs presented in the manual to help select the correct profile for your bean and voltage at the time. Profile 2 is probably the most interesting. Take a look at the manual, and you will see what I mean.
Typically though I used P3 or P4, depending on the bean and voltage. The others just didn’t work for me (crack problems mentioned below) and were probably due to my low-ish voltage. The different pound settings (1/4lb, 1/2lb, 1lb) will allow you more max time, but they also change the different segments a bit. I always use the 1 pound setting, that way I can have as much or as little time as I need. Experimentation is needed in this area. If you want to see one of my sample profiles, scroll down.
Roasting
The roast is even, and it seems to be a very steady, slower roast in general, which is in line with the published profile graphs. The agitation is pretty good, and I am sure that contributed to the even roasting. What I found when experimenting was that sometimes the first crack and the second crack ran together, other times it never arrived. Once I was dialed in, 1st crack and 2nd crack were about 2-3 minutes apart, with a total roast time of about 18-20 minutes; exactly what I was looking for.
Dumping and Cooling
The cooling cycle of the Behmor, if left to its own devices, is about 13 minutes. Most seasoned coffee roasters like to watch their roast, and when the desired roast level is achieved, stop the roast and cool the beans ASAP. ASAP means 30 seconds, 1 minute, basically as quickly as possible. You can get close to that with the Behmor. The trick is to allow the cooling cycle to kick in, and after 2 minutes, open the door (the 2 minutes allows the electronics and such to cool down, prolonging the machine’s life).
At this point, you can let it continue with the door open. In this case, the beans will be completely cool in about 3-4 more minutes (5-6 minutes total). This means you will need to stop the roast somewhat earlier and guess how the roast will “coast” to your desired roast level. The other option is to simply pull the drum after 2 minutes with gloves on and dump them into a big colander over a fan (or whatever your cooling method of choice is). I am lazy, and have been doing the former, but will soon be doing the latter.
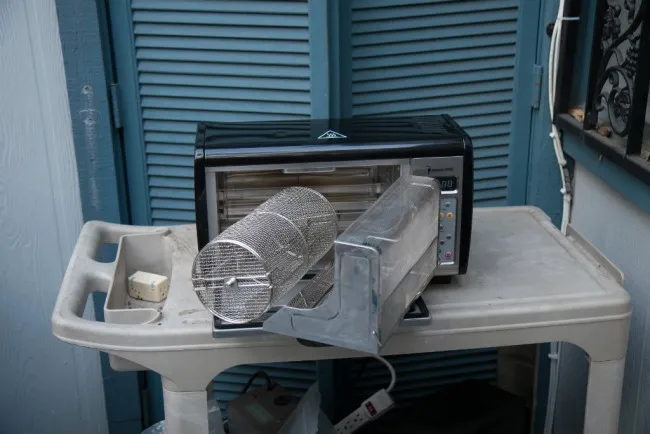
Behmor 1600
Cleaning and Maintenance
The chaff collector works well, and there is usually a small handful of chaff remaining inside the machine. I suggest buying a wide paintbrush from Home Depot or your local hardware store. The chaff can be swept into the chaff collector, which incidentally, fits very snugly into the front door once pulled out. This makes for almost seamless sweeping from inside the chamber to the collector. As recommended in the manual, after five roasts, run an empty cycle. This will keep oils and debris to a minimum and keep your roaster in tip-top shape.
Also, check the drum. You will find that with smaller or inconsistent beans (like a lot of Ethiopians I used, or Yemenis, for that matter), there will be a few that get stuck in the holes of the drum. Apparently, the stock drum provided with my unit is not really meant for the smaller or inconsistent bean types. If you do have to use the stock drum with these “odd” beans and they do get stuck, the only way to get them out is to lightly tap them with a heavy object like a small hammer. This forces them to the inside of the drum and breaks them apart, which allows for easy disposal of the fragments. It should be noted that another problem is that small beans can fall through the drum into the bottom of the roaster, which can increase the smoke early on.
Needless to say, the manufacturer does not recommend using the smaller beans with the stock drum. It looks like there will be a second drum option to address these issues. One partial workaround is to spin the drum by hand over a bowl or something and allow any of the small beans to fall through before putting the drum in the machine and starting the roast.
Lastly, wipe the inside of the glass window frequently. Sometimes, oils can fog up the window, making it hard to see the beans as they roast.
Flavor
I have roasted Brazilian, Ethiopian, and Island coffees, all with nice results. This machine really works well for espresso. As with many drum-like profiles, the flavors are slightly more rounded off and sweet, which is great for espresso. For drip or French Press, it still does a good job, but I like a brighter roast for these preparations. The Fresh Roast is the perfect companion for that job.
Tips
- Monitor voltage using a Kill-A-Watt. This will help you pick the best profile and time.
- When roasting inside, you might want to start out under the oven hood with the fan on high. Depending on the profiles you use, the bean selection, and the degree of roast you choose, you may or may not experience visible smoke. This roaster is designed with an afterburner, attempts to minimize smoke as much as possible, and does an admirable job.
- To help with placing the drum, which can be a bit tricky, start by turning the light on. Now, start placing the drum inside and hug the top of the roof. Now tilt the right side down so that the keyed shaft slides in, and then drop the un-keyed left side down, and you are done.
- Experiment! Get lots of the same bean (5 pounds or more), a KillaWatt, and keep a good roast log. That will be your best chance of success.
Chris’ Sample Profile
- 9 ounces Brazil Daterra Yellow Bourbon
- 115VAC With no load (dropping to about 111 or 112 volts when the heating element kicked in)
- 1 pound setting (set to 20 minutes)
- 1st crack at 16:00, 2nd crack at about 18:30
- I started watching Roast around the 15-minute mark, and hit the cool button at about 19 minutes.
- Very Sweet Espresso as a Single Origin Shot
Conclusion
The Behmor Roaster is built very well. It is priced well below its nearest competition – The GeneCafe and the Hottop. I personally will keep something like an iRoast or Fresh Roast in my arsenal for those times I want a brighter roast, and the Behmor will be my main espresso roaster.
Resources
Behmor 1600 Coffee Roaster – First Impression – INeedCoffee article.
Hottop KN-8828P Coffee Bean Roaster First Look – INeedCoffee article.